Creating Your First Template
Templates are reusable document configurations that save you time when sending the same document to multiple people. Once created, you can use a template to instantly generate signing sessions without having to set up recipients and fields each time.
Before You Begin
Make sure you have your document ready in PDF format. If you want to set up default recipients, have their names and email addresses handy. Templates work best for documents you send regularly, like contracts, NDAs, or onboarding forms.
Something to Consider
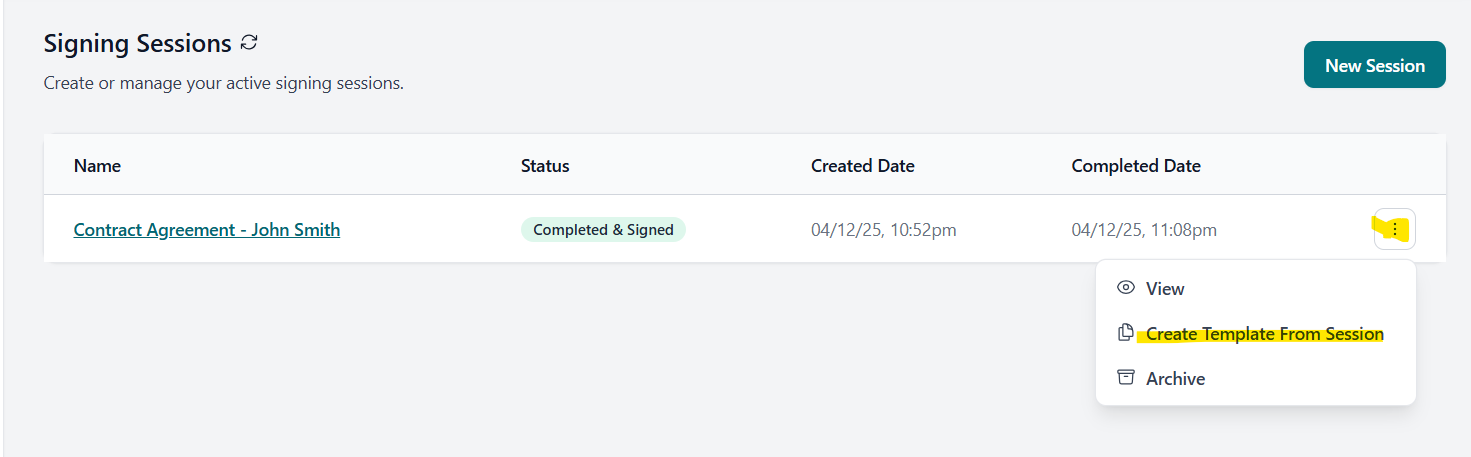
Already have a signing session set up the way you want? You can create a template directly from an existing session. Just go to your Sessions list, click the ellipsis menu (⋮) on any session, and select "Create Template from Session". This copies all the document fields and settings into a new template.
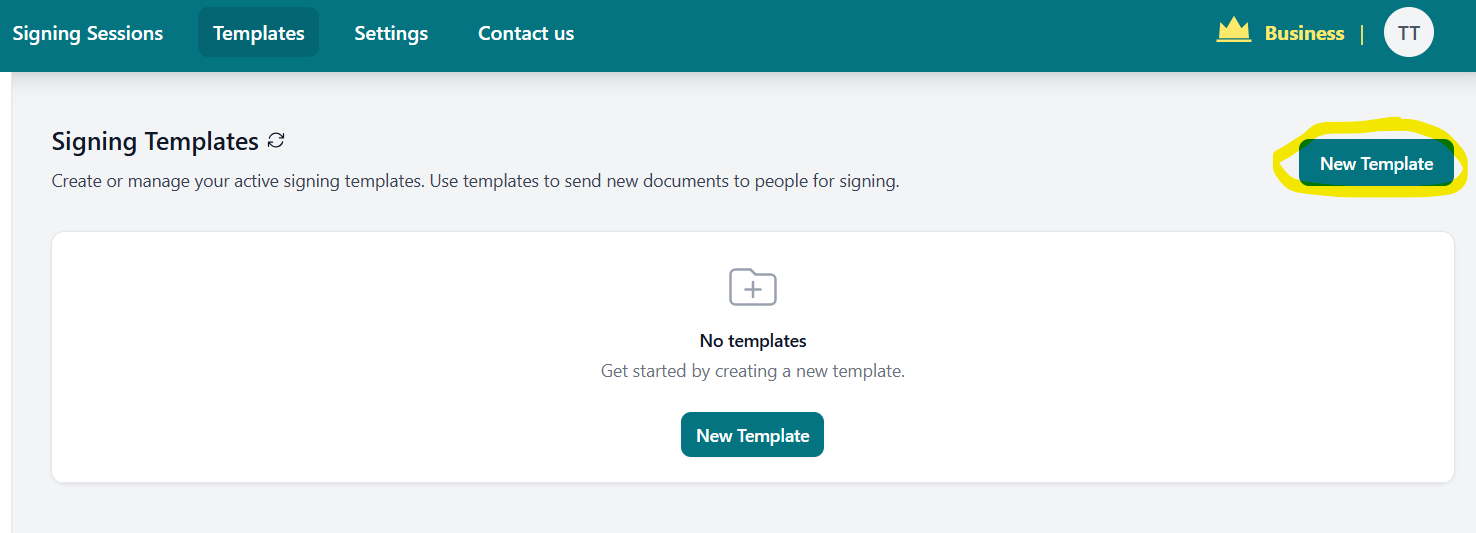
Step 1: Navigate to Templates
- Log in to your AirSign account at app.airsign.com.au
- Click on "Templates" in the main navigation menu
- Click the "New Template" button to start creating your template
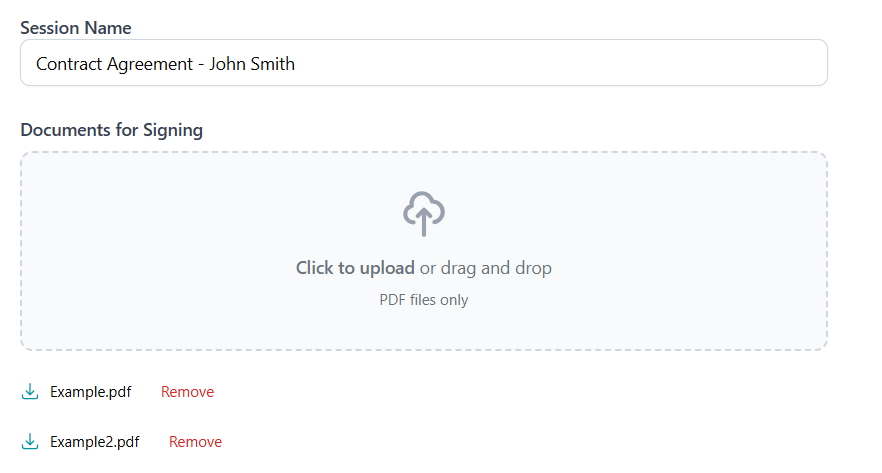
Step 2: Set Up Your Template
- Give your template a descriptive name (e.g., "NDA Agreement Template" or "Client Onboarding Form")
- Upload your document:
- Drag and drop your PDF file directly onto the upload area, or click to browse
- Supported format: PDF only
- Maximum file size: 20MB per document
- You can upload up to 5 PDF documents per template
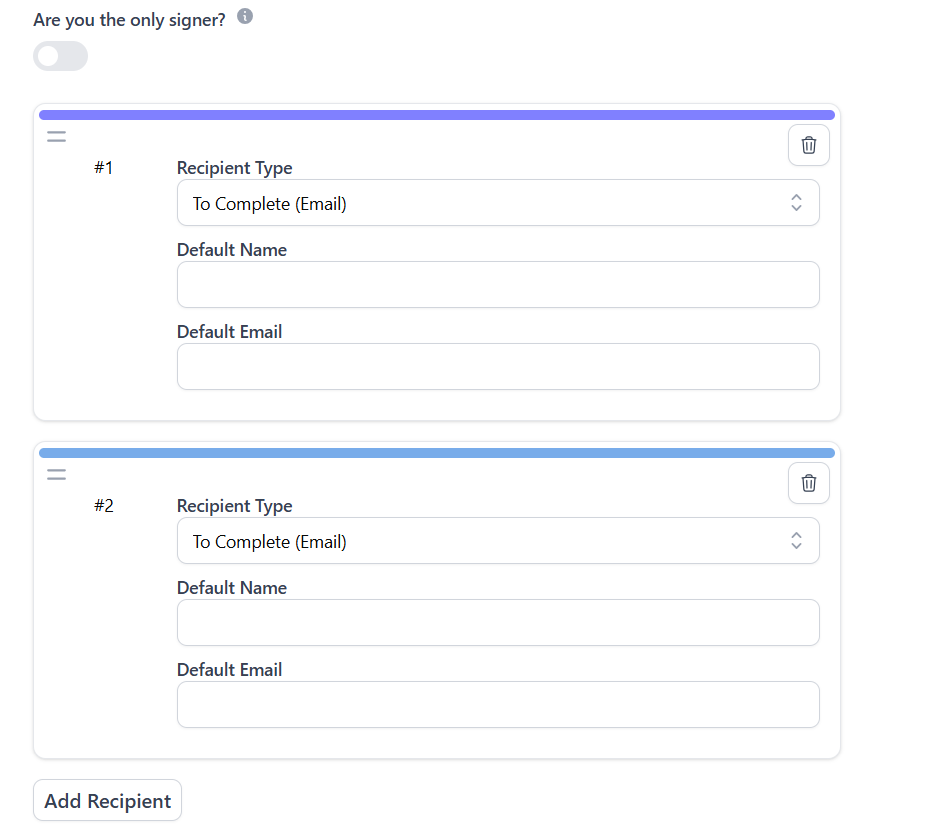
Step 3: Configure Recipients
- If you're the only person signing, check the "I'm the only signer" box
- For templates with other signers, add recipients but you don't need to fill in their name and email - these can be entered when you use the template
- For each recipient, you can configure:
- Type: Email signing, In-Person, or eWitness
- Signing Order: The sequence in which recipients should sign
- Add more recipients as needed using the "Add Recipient" button
Step 4: Add Template Variables (Optional - Advanced)
Template variables are an advanced feature that allow you to create dynamic placeholders in your documents. They're useful when you need to personalize templates with different text, names, dates, or images each time you use them.
Also we believe variables are a powerful and useful tool, if you're creating a simple template where recipients just need to sign and fill in fields, you can skip this step entirely.
For a comprehensive guide on when and how to use variables effectively, see our detailed guide: How to Effectively Use Variables in Templates.
Step 5: Add Signing Fields to Your PDF
- Click "Next" to proceed to the PDF editor
- For each uploaded PDF, you'll add fields where signers need to interact
- Select a field type from the toolbar and click on the PDF to place it:
- Signature Field: Where signers will draw or type their signature
- Text Input: For names, addresses, or other text information
- Dropdown Menu: For selecting from predefined options
- Checkbox: For multiple-choice selections (select all that apply)
- Radio Buttons: For single-choice selections (select one)
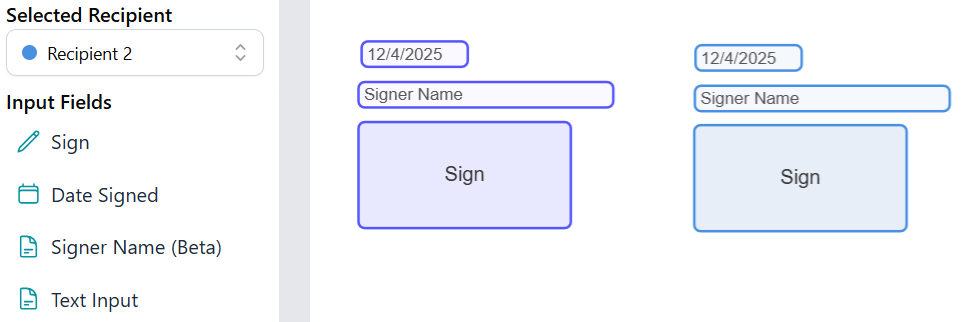
- Date Signed: Automatically fills with the signing date
- Signer Name: Automatically displays the signer's name
- Drag to position and resize each field as needed
- Assign each field to a specific recipient using the recipient dropdown
- For text fields, you can set placeholder text and default values
Step 6: Save and Activate Your Template
- If you uploaded multiple documents, click "Next" to move to the next document and repeat the field placement process
- Once all documents are configured, click "Save and Set to Active" to publish your template
- Alternatively, click "Save Draft" if you want to continue editing later
Step 7: Use Your Template
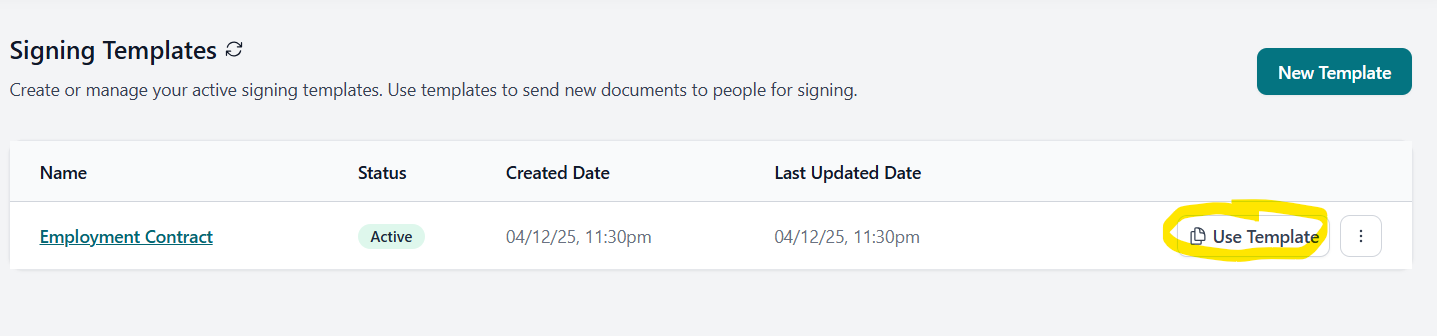
- Once active, your template will appear in your Templates list
- Click the "Use Template" button to create a new signing session
- Fill in the recipient names and emails, then send it out
Congratulations!
You've successfully created your first template! Now you can use it to quickly generate signing sessions. Simply click "Use Template" from the template page, customize the recipient details if needed, and send it out in seconds.
Pro Tips
Use Descriptive Names
Name your templates clearly so you can find them quickly. Include the document type and purpose (e.g., "Employment Contract - Full Time").
Pre-fill Default Values
Set default values for text fields that rarely change. This saves time when creating sessions and reduces errors.
Set Signing Order
For complex workflows, use signing order to ensure documents are signed in the correct sequence (e.g., employee signs before manager).
Leverage Variables
Use template variables for personalized documents. Replace client names, dates, or amounts dynamically when using the template.
Need More Help?
If you encounter any issues or have questions about creating templates, check our FAQ section or contact our support team at info@airsign.com.au.